How to Choose the Right Ceiling Stud for Your Project?
Choosing the right Ceiling Stud is a design decision, not a simple shopping task. It affects strength, fire performance, sound control, installation speed, and long-term maintenance. A lightweight stud may suit a small residential ceiling. It may fail in a large commercial space with heavy fixtures, mechanical services, or pressure from frequent maintenance.
Industry evidence supports careful selection. Grand View Research’s 2024 Metal Framing Market Report identifies construction efficiency, material consistency, and durability as major drivers of metal framing demand. Dodge Construction Network’s construction outlook also highlights labor productivity and installation speed as continuing project concerns. These findings make profile selection more important, especially when crews face tight schedules and limited access above the ceiling.
As steel-framing educator Don Allen, PE, explains, “Good framing begins with the load path.” That principle applies directly to every Ceiling Stud choice. Check the span, spacing, gauge, deflection limit, corrosion exposure, and connection method. Then confirm compatibility with the ceiling board, insulation, lighting, ducts, and access panels. ASTM C645 and AISI S220 provide useful technical references for nonstructural steel framing, but a standard alone cannot replace project-specific judgment.
A perfect choice does not always exist. Sometimes, a stronger stud creates unnecessary cost. Sometimes, a cheaper profile creates movement, cracking, or difficult installation later. The practical answer comes from balancing tested performance, site conditions, available tools, and the installer’s real experience. This guide examines those decisions clearly, while recognizing one uncomfortable truth: small framing details can produce very large project consequences.
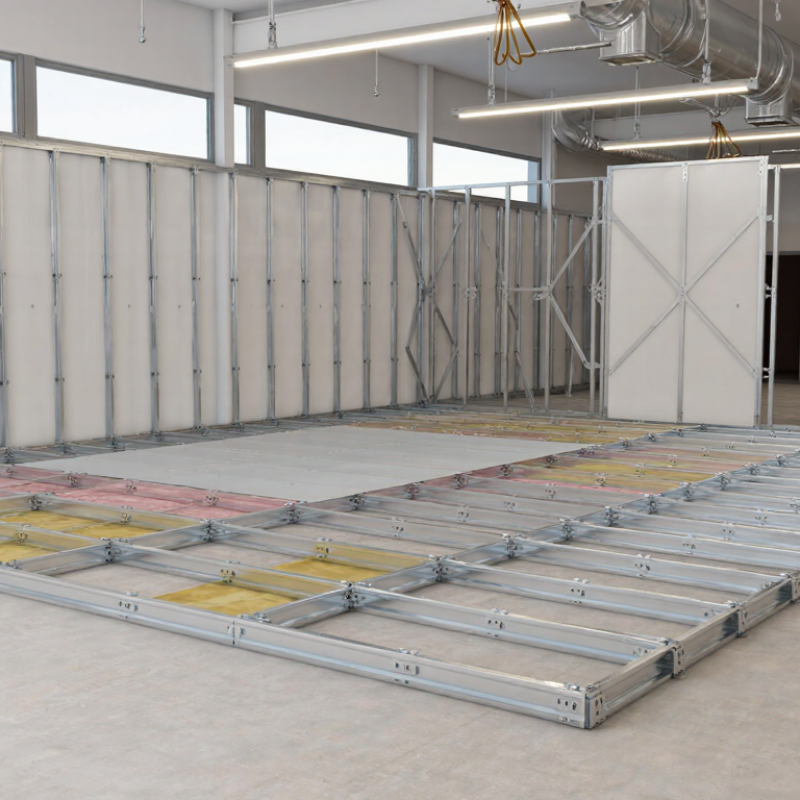
Understanding Ceiling Stud Types and Their Structural Roles
How to Choose the Right Ceiling Stud for Your Project?
Ceiling studs support finishes, services, insulation, and sometimes heavier fixtures. Their structural role changes with the ceiling design. In a framed ceiling, wood or metal members may carry board weight across a room. In a suspended ceiling, lightweight metal channels usually support panels rather than the building above.
Wood studs offer simple cutting, strong screw holding, and familiar installation. They work well where moisture is controlled and spans remain reasonable.
Metal studs resist insects and remain dimensionally stable in damp areas. However, thin sections can twist when overloaded. Check their gauge, shape, spacing, and permitted span. A ceiling member that looks rigid may still deflect noticeably under lighting or ductwork.
Measure the clear span carefully. Count every added load. Small details matter. Recessed lights, access panels, and acoustic layers can change the framing plan. On site, a laser line helps reveal uneven framing before boards are fixed.
I have also seen layouts fail because installers assumed wall studs and ceiling studs performed the same job. They do not. Ceiling members may need closer spacing or additional support around openings.
Use current local building requirements for fire resistance, moisture exposure, fastening, and allowable deflection.
A qualified structural professional should review unusual spans, suspended loads, or connections to existing framing. Product tables are useful, but they are not a substitute for site judgment. Recheck the plan when the ceiling becomes heavier than expected.
Assessing Load Requirements, Span, and Ceiling Conditions
How to Choose the Right Ceiling Stud for Your Project?
Choosing a ceiling stud begins with the load, not the price. Calculate the ceiling’s own weight, insulation, lighting, ductwork, and access panels. Heavy fixtures may need separate blocking or doubled framing members. A small error here can create visible sagging. Check local building codes and published span tables before cutting materials. When the load is unusual, consult a qualified structural professional.
Span is equally important. Longer spans usually require deeper or stronger members to control deflection. Measure the clear distance between supports, not the room’s overall width. For example, a 12-foot span may behave poorly with undersized framing, even when the ceiling appears light. Keep service holes within approved limits. Never notch or drill critical areas casually. Load paths matter.
Ceiling conditions can change the decision. Inspect for moisture stains, previous movement, uneven masonry, and limited bearing at each end. In a renovation, old framing may look solid but feel soft around fasteners. That detail is easy to miss. Leave space for wiring, ventilation, and insulation without compressing them. A level line helps, but it does not correct weak supports. Recheck measurements after removing finishes; drawings often hide inconvenient conditions.
Comparing Stud Materials, Sizes, and Installation Methods
How to Choose the Right Ceiling Stud for Your Project?
Ceiling studs must match the load, span, moisture level, and framing system. Wood studs are easy to cut and accept screws firmly. They suit many residential ceilings and small remodeling projects. However, wood can twist as moisture changes. That movement may create cracks around plasterboard joints. Metal studs stay straighter and resist insects, but they need suitable cutting tools and fasteners. They can also transmit sound unless the assembly includes acoustic insulation. Measure twice. It still happens.
Size matters more than many installers expect. A wider or deeper stud usually provides better stiffness across longer spans. Check the ceiling plan, expected fixture weight, and local building requirements before choosing dimensions. Standard spacing may work for ordinary boards, but heavier finishes often need closer spacing. Avoid guessing from an older ceiling. Older framing may already be undersized or damaged. I have seen a neat surface hide weak timber above it.
Installation methods depend on the material and substrate. Timber studs commonly use screws or approved structural fixings into joists or blocking. Metal studs require compatible tracks, clips, and self-drilling screws. Keep every member aligned with a laser or taut string line. Leave service openings controlled and reinforce areas around heavy lights or access panels. Wear eye protection when cutting metal. A small burr can cause a surprisingly deep injury. Recheck level after fastening, because tightening one side can pull the frame out of line.
Checking Building Codes, Spacing Standards, and Compatibility
Choosing the right ceiling stud begins with the building code, not the product shelf. Local rules may specify fire resistance, corrosion protection, deflection limits, and permitted framing methods. Confirm the requirements with the local authority or a qualified building professional. A ceiling supporting insulation, lighting, or mechanical equipment may need a different design than a decorative suspended ceiling.
Spacing standards also matter. Many systems use regular centers, but the correct distance depends on stud depth, material thickness, span, and applied load. Measure the room and mark a clear reference line with a laser or chalk line. Then check whether the proposed spacing matches the framing tables and project drawings. I have learned that a small measuring error can create visible waves across a finished ceiling. It is easy to underestimate this problem.
Tips: Check every dimension twice. Inspect the substrate for moisture or cracking. Confirm that fasteners suit both the stud and the supporting surface. Do not mix components casually; track width, thickness, connection type, and compatible accessories. A ceiling stud designed for one framing system may not fit another, even when the profiles look similar. Leave room for ducts, wiring, insulation, and access panels. I still recheck these clearances before installation, because real sites rarely match the original drawing perfectly. When uncertain, pause and obtain written guidance from the designer or code official.
How to Choose the Right Ceiling Stud for Your Project
Common on-center spacing options in light-frame construction are shown below. A 16-inch layout is widely used for general framing, while 24-inch spacing may be suitable when permitted by the selected member, span, load, and local building code. Always confirm the required spacing and member size with the applicable code and project plans.
Compatibility depends on the stud or joist material, nominal dimensions, span, ceiling finish, insulation, access loads, fastener requirements, and whether the framing is designed for a suspended ceiling or a direct-finish ceiling.
Selecting the Best Ceiling Stud for Your Project Needs
Selecting the best ceiling stud starts with the room’s actual demands, not just its price. Measure the span, ceiling height, fixture weight, and available service space. A shallow stud may suit a small bedroom, while a deeper section can reduce deflection across a wider ceiling. Check the manufacturer’s load tables and local building requirements before ordering materials.
Material choice also matters. Galvanized steel studs resist twisting and offer predictable dimensions, which helps when installing drywall. Choose a suitable gauge for the span and expected loads. Heavy lights, access panels, insulation, and acoustic layers may require stronger framing or closer spacing. Moisture-prone areas need corrosion-resistant protection. Dry rooms are less demanding, but careless storage can still damage thin sections.
Think about installation conditions. Can the stud pass through the doorway? Will pipes and electrical cables fit without weakening the frame? Keep penetrations within approved limits, and reinforce areas supporting fixtures. Small errors become visible as ceiling cracks. That is easy to underestimate. A common mistake is selecting studs by length alone, then discovering excessive movement after boarding. Recheck the span, spacing, and load path before cutting. When the ceiling carries unusual equipment or a fire-rated assembly, obtain guidance from a qualified structural professional. It may feel slower, but it prevents an expensive correction later.